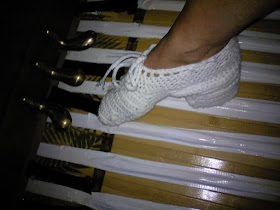
Sandra Dee Thomas has posted about her journey towards making an affordable alternative to organ shoes, which is a very novel idea. Now that she has perfected her pattern, she has graciously agreed to write a guest post for the blog. As Sandra says, "Shoes are best if you have the money. However, if you don't, or have tried the shoes and do not like them, the Organ Slippers are an alternative. They are a blend of both socks and shoes."
Thanks for sharing your efforts with us, Sandra!
(To view the pictures larger, just click on them.)
Organ Slippers
How to make them
By Sandra Dee Thomas
How to make them
By Sandra Dee Thomas

Materials:
1 skein of medium weight yarn (your choice of color)
Crochet hook: size E/4 or 3.50 mm
1 10.5"x13.5" sheet of Ultra Stiff Plastic Canvas
1 yarn needle
1 small bag of cotton balls or 3" strips of an old towel for stuffing heel form
1 pair of inexpensive shoe inserts for a guide in shoe sizing (trace out your size)

Overview:
If you can single and double crochet, you can easily make them. Everything is single crochet until you reach the second-to-the-last row in the top of the shoe (7th row). The 8th row is then double crocheted to make room for the adjusting string or shoe lace.
The key is to make sure they are snug on your feet so they do not shift.
By simply following the shape of the insole the slipper should fit just fine.
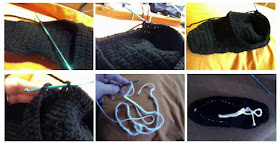
Making the Main slipper:
- Begin at the heel
- Chain 8 stitches.
- Turn and single crochet back through the first row of stitches.
- Increase one more stitch at the end of the row. Chain one and go back.
- Continue going back and forth, increasing one stitch at the end off each row until you reach 12 stitches.
- Stop increasing the stitches in the rows. Crochet back and forth until you reach the ball of the foot.
- Beginning at one end of the last row, crochet back, pick up an extra stitch at the beginning of the second-to-the-last row, reverse. Continue in like manner until you have reached just past the joint of the foot.
- Next, single crochet continuously all around the slipper, reducing stitches at the front as necessary for fit to form the sides of the slipper.
- Double crochet the next row. Single crochet one more row. Tie off. Make a string (125-150 single crochet) and loop it through the double crochet.
- Turn the slipper over and begin making the pocket for the heel. At this point you may want to stop and make the heel form so you can better shape the pocket to the heel form insert.


Heel Form Insert


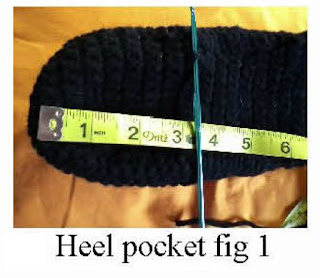
Heel Pocket
- Measure 3 1/2" from the back of the heel or tie the slipper onto your foot placing the crochet hook on the front edge of the ball of your heel. Hold. Insert the hook into one edge and start single crocheting around the back edge of the slipper.
- At this point, it would be a good idea to place the heel form on the slipper with the widest side next to the slipper so that you can have a guide as to how far toward the heel you need to make the pocket wall. Starting at where you first inserted the hook, you should go one row beyond 2 1/2".
- Continue around the back of the slipper until you have made a "horse shoe" shape. Chain one and reverse back, building a wall that is one row over the top of the heel form. At this point, crochet down one edge of the wall and across the middle of the slipper to connect the two sides of the wall with a single row of crochet. Tie off. Cut yarn.
- To close the heel pocket, insert the hook into one back edge of the heel pocket wall as shown in figure 4. Using the form as a guide, crochet back and forth to cover the form.


Sandra has also been working on a portable (silent) pedal board which can be used with pianos and small keyboards, and has promised to share that tutorial in the future. Thanks again, Sandra!
If you would like a .pdf copy of this information, you can email Sandra at SandraDeeSilva at yahoo dot com.
I welcome guest posts from my readers. If you have something you'd like to share, please contact me at ldsorganistblog at gmail dot com.
Thanks for reading!

Definitely can't wait to see the portable silent pedal board. I could definitely use something like that!
ReplyDeleteI have the Sielent pedalboard.pdf file finished. There are 3 different versions. Contact me at SandraDeeSilva@yahoo.com if you want a copy of it.
ReplyDeleteDoes the yarn slide across the pedals like organ shoes? I would like to hear from people who have mad these and used them and how they like them.
ReplyDeleteI would think it would be good to sew some suede leather on the bottom surfaces of the crocheted slippers.