
In this lesson we'll continue marking hymn 296, "Our Father, by Whose Name." In the last lesson we marked breathing. This lesson we'll mark the pedaling. It would be helpful to review Lesson 6: Breaking in Those Shoes and Lesson 7: More pedaling before continuing.
First Things First
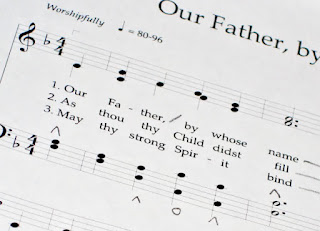
Take a look at the movement of the bass line. It starts on F, moves downward, then jumps back up to F. It makes sense to begin with the right foot, switch to the left, then back to the right. What's the best way to do this? I'm going to start with my right toe for the two F's, then move to my left toe, down to my left heel, then switch back to my toe for the second C, and finally back up to my right toe. Notice how I don't repeat the mark on the second F:
The next section starts on F, skips to D then Bb before stepping up to two C's and jumping back to F. It makes sense to start with the right foot. I'm going to play the F with the right toe, the D with the right heel (you could choose the left heel), the Bb with the left toe, the first C with the left heel, the second C with the left toe, then jump to the F with the right toe. There's no need to mark the first F of this phrase, but I did just for this example:

The second line is identical to the first, so I will pedal it the same: right toe for the two F's, left toe on D, left heel on C switching over to toe for the second C and right toe on the three F's, the D with the right heel, the Bb with the left toe, the first C with the left heel, the second C with the left toe, the F with the right toe.
The final two lines
The third line is a little more tricky. Since the right foot plays the F with the toe at the end of the second line, it's a good idea to begin the F on the third line with the right toe as well. I chose to play all three F's with the right toe, the D with the right heel, and the A with the left toe.
Looking ahead, the next three notes are Bb, low F, and C. In order to reach the low F, I'll play the Bb with the right toe, the low F with the left toe, and the C with the right toe. It will be important to pre-locate these notes when playing this hymn:

The next eight notes have a jump up, then a series of steps down to F, followed by a double-skip to C. The Bb will need to be played with a toe. I chose to play the A with the left toe, the D with the right toe, C with the right heel, Bb with the right toe, A with the left toe (as before), G with the left heel, and low F with the left toe.

What to do with the C? Should it be played with the right toe or heel? That depends on whether the Bb will be played with the right or left foot. I'm choosing to play the C with the right toe, and the Bb with the left toe:

The final notes of the hymn are a bit tricky. I'm choosing to play the Bb with the left toe, as mentioned above, the A with the left heel, the C with the right heel, the F with the right toe, the Bb with the left toe, the C's with the right toe, and the final low F with the left toe. You may choose to pedal these notes differently:

Marking the Lifts
It's now a good idea to go through and mark the places in the hymn where the foot needs to lift, such as between repeated notes. If the first note is a quarter note or less, place the breath mark (') exactly between them. However, if the first note is more than one beat, place the breath mark where the lift needs to happen:

While you may not need these lifts marked in the future, as an organ student they will help immensely in solidifying proper technique now. Don't skip this important step.
Homework
Practice the pedaling of this hymn. Follow the breathing you marked last lesson, and the breath marks, or lifts, that were marked today. Release these repeated notes in rhythm, and make sure the legato is unbroken when moving from heel to toe or foot to foot. Practice with a metronome, and play the introduction and all three verses, as the breathing can differ from verse to verse.
In Conclusion
When learning a new hymn, it's important to practice the pedal alone, especially if playing with your feet is new to you. It may be difficult at first, but over time it will become second-nature.
Continue on to Lesson 16: Marking a hymn, part 3.


No comments:
Post a Comment