Welcome to The Latter-day Saint Organist's Resource Blog

The purpose of this blog is to help pianists learn to become true organists. Many individuals believe that if you play the piano you can play the organ, but the instruments differ greatly. While this blog is specifically geared towards members of The Church of Jesus Christ of Latter-day Saints, much of the information shared can be utilized by all. I hope that the information I share here will help you become an effective organist in your ward, stake, or other congregation.

Feel free to browse and search this blog. It was started in January 2010 and while new posts aren't added very often, this blog contains a wealth of information and is a wonderful resource for all organists. If you're a new reader, you can find the first lesson here: Before We Begin: Acquiring the Essentials. Also, please "like" the corresponding facebook page, which is updated more often. A link is provided on the right sidebar, or you can click here.

Thanks for visiting!
Showing posts with label lessons. Show all posts

Tuesday, September 10, 2019

Choosing Effective Fingerings in Hymn Playing

When your feet play the bass line, your hands are freed to split the soprano, alto and tenor notes. This article will help you learn the steps to choosing efficient fingerings that will simplify your hymn playing.


I apologize! This post is long overdue. In April I taught a class on this topic at the Super Saturday event sponsored by the Utah Valley Chapter of the American Guild of Organists. It's a subject I've always wanted to create a handout for, as I feel this topic isn't taught or focused on enough, and I finally did! Please note that this post will read differently from my other posts, as this information accompanied the class I taught. Please feel free to comment with any questions.


Choosing Effective Fingerings: Guidelines

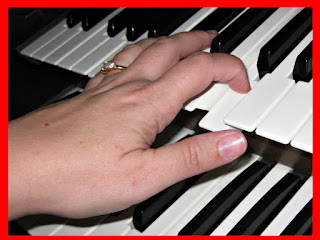
Fingering is deciding which combination of fingers to use to play a group of notes. The goal of choosing fingerings is to utilize natural finger combinations, while minimizing awkward stretches and finger crossings. When you use good fingering, your hand will be balanced and in control. Taking the time to find a way to play each passage as efficiently as possible will greatly aid your hymn playing.

In some passages of music, notes are arranged conveniently for the fingers, moving within a narrow range with the same number of notes as there are fingers to play them. These passages can be played with direct fingering, without using complicated finger combinations or shifting of the hands.

Other passages are much more difficult to play, requiring finger acrobatics and many hand shifts. In these passages, there aren’t enough fingers to play all the notes, so other fingering techniques must be utilized. You may have to cross your thumb under your fingers or cross your fingers over your thumb. You might play a key with one finger and, while holding it down, switch to another finger. These techniques are covered on the next page of the handout. Whether a passage is easy or difficult to play, good fingering is always important.

Following are some general rules for good fingering:

1. Mark breaks in the hymn text first, to show where complete breaks (hand shifts) will naturally fall.

2. Place the fifth finger of your right hand on the highest note in the passage, and the fifth finger of your left hand on the lowest, then use the most convenient finger on each key as you play the notes leading to and leading away from that note, compressing and extending as needed.

3. If you run out of fingers, go back and try stretching your hands to distribute them over a wider area of keys. If you still cannot make direct fingering work, incorporate different techniques.

4. Never use your fifth finger before you arrive at the highest note in the right hand or the lowest note in the left hand, without planning for effective finger crossing, glissando, or finger substitution.

5. Try several different fingerings for complicated passages, keeping in mind efficiency and economy of motion. Choose the one that feels most natural to your hands. Sometimes you will need to work backwards, knowing how you need to land on a certain chord then figuring out how to get there.

6. Once you have chosen the best fingering for a passage, pencil the finger numbers above or below the notes on the page, also marking where redistribution of the inner part occurs.

7. Use the same fingering patterns for similar passages to facilitate muscle memory.

8. Always use the same fingering when practicing a hymn or a song, to build muscle memory. Good fingering will improve the smoothness of your playing, help you learn a song more quickly, and give you confidence against slipping or playing a wrong note.

(The above information is borrowed from Keyboard Course, pg. 133, published by The Church of Jesus Christ of Latter-day Saints, with additions and changes by Jennifer Morgan)

Additional Guidelines:

The best approach for hymn playing is a legato touch, while preserving independence of line. This means that the released repeated notes in one voice, such as the alto voice, cannot effect the legato of changing notes in another voice, such as the soprano voice. The ability to play one part legato while playing another part detached is one of the great challenges of organ playing.

• Lift repeated notes with precise releases (give them a consistent eighth or sixteenth rest)

• Connect non-repeating notes in each voice part

• The soprano line is king, and must be protected, even if the first two rules must be broken

• A repeating bass line can be connected, judiciously, as long as strong beats are accented

• Playing the bass line with the feet frees up the hands to play just soprano, alto, and tenor lines

Become very comfortable with independent movement, where one finger sustains notes while another lifts. Remember that different horizontal lines (soprano and alto, for example) operate independently, while being played by the same hand. Since the organ has no decay, the timing of a note’s release is as important as the timing of its attack. Repeated notes are a great place to shift fingering!

Legato organ fingering techniques to utilize:

Regular, or Direct Fingering
Placing fingers on adjoining keys, the fingers play and stretch or compress to play the notes without crossing or utilizing any other techniques—the notes fall naturally under the fingers.

Redistribution of the Inner Part (combines well with Direct Fingering)
Since the bass line is played with the pedals, the left hand only needs to play the tenor part. Many times the soprano and alto parts are difficult to finger with the right hand alone, so the left hand can grab the alto part, redistributing it to the left hand. As needed, the left hand can grab the soprano note as well, or the right hand can play the tenor note.

Finger Crossing
Finger crossing is utilized in scale exercises. Generally, a longer finger crosses over a shorter one, or a shorter finger crosses under a longer one, but exceptions can be made in different circumstances. A very common application is for ascending or descending thirds to be played by fingers 4/2, then 5/1, then 4/2, etc.
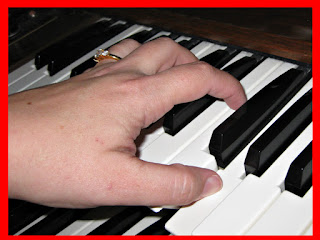
Finger Glissando
A finger glissando is when the finger or thumb slides from a black key to the adjoining white key.

Finger Substitution
In finger substitution, one finger is replaced by another during the same note so that finger is freed to play another note.

Thumb Glissando
This technique occurs from white key to white key, or white key to black key, and utilizes the thumb as if it were two fingers, one being the base of the thumb and the other the tip. While it’s a tricky technique to master, thumb glissando is an essential way to play certain passages of organ music.

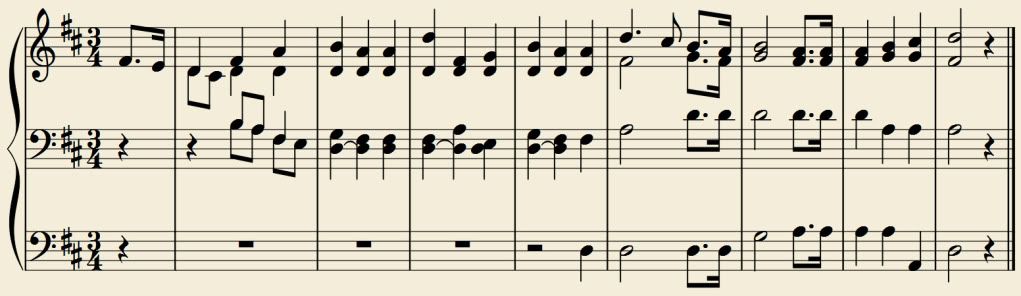
Here are exercises illustrating these techniques from The New LDS Organist:


In the class I handed out paper keyboards and had those in attendance come up with some fingerings. Here are a few examples of effective hymn fingerings that I shared with the class:


In Conclusion

By placing the fifth finger of your right hand on the highest note in the passage, and the fifth finger of your left hand on the lowest, then redistributing the inner part as necessary and writing in the fingerings, you can make playing many of the hymns so much easier! It's amazing how much simpler the hymns become when your hands aren't trying to move all over the keyboard. Of course, learning to play the bass line in the pedals simplifies what your hands need to play.

I recommend playing through several hymns, then choosing one to work out fingerings according to these guidelines. See how this process works for you.

Thanks for reading!


Monday, September 26, 2016

Let the People Sing!


A couple of years ago, while researching how to encourage congregational singing, I came across an article with the title, "Let the People Sing!" and that phrase has stuck with me. It seems many varied denominations and congregations struggle with congregational singing. My congregation struggled with singing as well when I was asked to be our regular organist two years ago. Now, they will even sing unfamiliar hymns with volume and expression.

How did we get to this point?

First, as soon as I was asked to play the organ I did my research.  I read everything I could find about encouraging congregational singing.  I studied every resource at my disposal, and drew upon all of the training I could ever remember receiving. Then I came up with my personal philosophy, for my individual situation, most of which I believe can be applied to all congregations with an organ-led worship service.

1. Music needs to be more present.

What does this mean? This phrase was always at the forefront of my mind, and I worked to understand what it means for music to "be more present."

First, I decided that it meant that I needed to be more deliberate with all of the music I provided, from prelude and postlude to the length and quality of the introductions, the volume of the organ, and the registrations and registration changes.  It also meant having the congregation sing the "extra" verses at the ends of the hymns, and not routinely cutting hymns or verses, citing lack of time. In my congregation, music needed to be present and treated as important.

This first step in this process was to embrace the attitude that music is vital to the congregation's worship, and we should make no apologies for it; whether music is found in introductions that may be longer than normal, or for an organ prelude that continues to a resolution, even if the bishopric or clergy member has already risen to begin the meeting. (Please note that is very important to time your prelude to end at the agreed upon meeting start time, and to resolve the piece in a timely manner, even if you haven't reached the actual conclusion of the piece.)

The second step is to prepare, prepare, and prepare! Do everything in your power to make the musical aspect of your worship service effective and powerful.

The final step is to evaluate, make any needed changes through prayer and reflection, and try again. Work towards a slow yet steady improvement over time.


2. Music needs to be worthy of attention.

Prelude and postlude needs to be planned in advance and practiced until it is worthy of the congregation's attention.  Even if this music simply consists of hymns played directly from the hymnal, there are ways to enhance their musicality, making them beautiful and appropriate to set the tone for worship.  First, experiment with different registrations.  Prelude, with very few exceptions, should not be played with the same registration or volume utilized to accompany congregational hymns. Registration during prelude should vary from piece to piece, if not verse to verse.  Make prelude something special, something worthy of attention that will invite the congregation to ponder, reflect, and prepare for worship.

Likewise, the introductions to the hymns themselves should inspire the congregation to desire to sing. While many hymnals have bracketed suggestions to indicate possible introductions, these brackets are just that: suggestions.  I've found, personally, that many of these introductions are too short to allow the congregation time to shift gears from listening to participating, then pick up and open their hymnals to the proper hymn number and prepare to sing. Keep an eye on those who sit on the stand near you.  If their hymnals are not open and ready to go at the end of your introduction, or if the congregation's volume quickly increases through the first few measures of the hymn, your introduction was probably too short.

Dale Wood, who was a renowned composer, organist and choral director, created a collection of "Festive Hymn Introductions," and in his forward he gave sound advice that I have taken to heart:
 Hymn playing should never become a routine and commonplace thing. A conscientious organist must continually inspire the congregation and not allow the singing to become monotonous and prosaic.
Make sure that hymn singing in your congregation is a new experience every time (I highly recommend clicking that link and reading my article, "Hymn Singing Should Not Be Boring"). Follow the hymn text as you play. Study the hymn text in advance. Be familiar with the poetry of the hymn. What is the message of the hymn?  What is the message of each individual verse? How can you, as organist, highlight these? What is your registration plan? Where in the verses should the organ "breathe" and where should the organ sustain?  How can you use the resources at your disposal to paint the message of the hymns with your registrations, registration changes, and creative or free hymn accompaniments?

Will your plan be effective? Will it support and encourage the congregation in singing with the Spirit?  Will it solidify the message of the hymn and touch hearts? Will it draw undue attention to itself, thus detracting from the message of the hymn? Will what you did last time be the right plan for this time?  If not, what changes do you need to make when you accompany the hymn this time?

Most importantly, hymns need to played at their proper tempo!  Invest in a metronome, or download a free app that includes a metronome component.  Play through the entire hymn with the metronome to ensure that you are playing consistently and properly. Is the tempo so slow that the congregation runs out of breath in the middle of a phrase?  Is the tempo moving so quickly that the words are difficult to pronounce in the allotted time? Will the congregation check their watches, wondering when the hymn will finally end? Or will the congregation so comfortable in focusing on the words that they will give no thought at all to the tempo of the hymn?


3. Realize That You Are Developing a Relationship with Your Congregation

Whether you realize it or not, and whether your congregation realizes it or not, you are developing a relationship with each other.

Can your congregation trust you implicitly?

Are you consistent with your breaks after your introduction and between verses?  Is there a chance a member of your congregation will begin to sing full voice, all alone as you're taking extra time to change registration? Will you cut off and stop playing while members of your congregation are still singing the final notes in full voice? Can your altos or tenors count on you to consistently play their notes correctly?  Can your congregation count on your volume to adequately support their singing, even if you make registration changes during the hymns?  Will your registration change leave them singing full voice with little organ support? Will they be afraid to sing out because they don't have the trust that you will be there to catch them?

When your congregation is to sing an unfamiliar hymn, can they trust you to play the entire hymn through before they begin to sing so that they will not encounter any surprises? Is your registration strong enough on the first verse so that they feel comfortable singing out on an unfamiliar hymn? Will they be able to hear themselves sing, or will the organ overpower the congregation? Is your registration effective on well-known hymns? Do you enhance the message of hymns they know well and seek to inspire the congregation through your playing so that familiar hymns don't become boring? Is your congregation excited to worship together through the singing of hymns?

What is your relationship with your congregation?


4. When In Our Music, God Is Glorified

 Remember why you play the organ.  Remember why music exists in worship. Remember that the purpose of your calling is not to call attention to yourself. You are playing the organ to help invite the Spirit and enhance worship for your congregation.

Create Zion. The only time your congregation will be of one heart and of one mind is while they sing. Foster this experience for them. Show them a little bit of heaven every time they sing the hymns.  Allow them to worship uninhibited. And remember: People will actually sing if you let them.

Do you hear the people sing?

Monday, March 14, 2011

Lesson 26: When to Tie or Break, Accents, and Strong/Weak Beats

Click here for Lesson 25: Leave the Piano Hands at the Piano.

As I was teaching a stake organ training last month, many in attendance had the same perception when it came to organ playing, "You try to hold every note down you can so that there aren't any breaks in your playing." Hopefully the readers of my blog know by now that this is not true. However, I thought it would be a good time to review some legato technique and the reasons behind it.

Accents on the Organ

Before continuing with this lesson, however, we need to understand how accents work on the organ.

How do you accent on the piano? Simply by hitting the keys harder. More force creates an accented note or notes.

Does this work on the organ?

No matter how hard you press the keys, you won't hear any accents on the organ, so don't try! How do we accent notes on the organ? Through silence, either before a note, after a note, or both.

With that understanding, let's continue on with this lesson.

Repeated Notes Should Generally Repeat

When a note repeats, it should usually have a moment (or more) of silence as the finger lifts before being repeated. Generally, the silence is equivalent to an eighth rest, but circumstances do vary.

What was that? How is that legato technique? Wouldn't it sound awfully "broken" with all of that fractured silence?

On the contrary: The silence provides accents and allows the congregation to follow the organist, stay on tempo, and sing with confidence.

I've played for stake conference on multiple occasions. I can remember one time in particular when I felt like I was fighting the huge congregation on tempo. I was trying to keep the tempo, and they were dragging, causing the tempo to continually slow.

Last month I again played for stake conference. In addition to using the techniques I'm sharing below, I followed the strong/weak beat accents as I played hymn 3, Now Let Us Rejoice, emphasizing the beat with the bass by tying the first two notes to make beat 2 very weak, instead of playing three repeated notes in each measure. Instead of playing an "OOM pah pah, OOM pah pah" it felt more like it was being sung and played in 1 instead of 3.

To my surprise and delight, the huge congregation stayed with me perfectly! They heard and responded to the strong and weak beats.

Strong and Weak Beats

So what if all of the voices repeat? Having complete silence when the text doesn't call for it can't be proper legato technique, right?

It can be proper technique! If all four voices repeat, we need to follow the strong beat/weak beat guideline.

If the time signature is in 4, do you know which beats are strong beats and which beats are not? What about in 3 or 6 or 2?

In four, the strong beats are beats 1 and 3, and the weak beats are 2 and 4. If you're familiar with poetry think trochee; "ONCE upON a MIDnight WEAry."

In two, beat 1 is strong and beat 2 is weak, as in the above textual example.

In three, beat 1 is strong and beats 2 and 3 are weak. If you're familiar with poetry think dactyl; "JUST for a HANDful of SILver he LEFT us."

In six, beats 1 and 4 are strong, and beats 2, 3, 5, and 6 are weak, as in the above textual example. Six is often felt and/or directed in 2 with a triplet feel.

How can we help the congregation feel the strong and weak beats? We do this through our treatment of repeated notes. In this example, all four notes repeat throughout the measure:


How would we preserve the strong beat/weak beat feel in this measure? By tying the alto, but where?

Beats one and three are strong, so let's lesson beat four by tying the alto:


In this measure we'll have a complete break before beat three, but not before beat four. It would be played like this, with red lines added to emphasize note length:


This technique allows the congregation to feel the beat and respond appropriately.

Non-Repeated Notes Should Generally Be Played Legato

This should make a lot of sense to everyone. If the notes don't repeat, they're played without breaking them apart.

There are some exceptions to this rule.

First, if the text breaks, so should the organ, as outlined in Breathing:


What if the note the soprano plays is immediately played in the alto? Or the note the alto plays is immediately played in the tenor? In examples such as these, a common tone is shared, and we need to follow these rules:

The soprano line reigns supreme. When the soprano line is ascending and common tones are involved, tie the common tones so the soprano line remains unbroken:


When the soprano line is descending and common tones are involved, break the common tones so that the soprano can play the note:


The soprano line is king and gets to be played properly, always.

For inner voices:

When a note changes from the tenor voice to the same note in the alto voice, tie the notes:


When a note changes from the alto voice to the same note in the tenor voice, break the notes:


Why hasn't the bass been included here? Because the bass is sovereign--it gets to be played as written by the feet without interference from any other parts.

Don't be afraid of silence!

In conclusion, to play the organ do you "try to hold every note down you can so that there aren't any breaks in your playing"? Absolutely not. As outlined above, it is very important to have breaks in your playing, provided they are used appropriately and according to these guidelines and rules.

Go out and grab a hymnbook and see what you can do, following these rules!

Tuesday, November 23, 2010

Lesson 25: Leave the piano hands at the piano

Click here for Lesson 24: Creative Introductions for "Now Let Us Rejoice"

Hands at piano
Image Source

I realized as I've reviewed past posts that I never specifically showed what proper hand position is at the organ! Today's lesson will cover this important topic.

Proper Positioning at the Organ
First let's review information that was spread out in the first series of lessons.

When sitting at the organ, keep the head, neck and upper torso aligned as if you were standing. Some like to think their head being pulled towards the ceiling by a string.

Stay relaxed and flexible through then neck, shoulders, upper arms, lower arms, and into the wrists. Keep your elbows close to the body.

Proper Hand Position

According to Don Cook:

"The forearm and back of the hand are aligned in a level forward-back plane, with no sharp protrusion of the knuckles. The back of the hand is level from side to side, guiding the fingertips into the keys with no tipping from left to right. The fingers curve naturally, and the fingertips rest naturally on the keys." I could have lifted my wrist a bit more. (I didn't realize how hard it was to take a picture with one hand while holding the other in proper position!)

Curved hand position

"Nails must be cut short enough to allow fingertips--not nails--to contact the key."

Short nails, curved fingers

Additionally, you should play with your fingers in front of the black keys whenever possible.

Here are some incorrect examples:


Playing between the black keys instead of in front of them:
Playing into the black keys

Sunken hand:
Sunken hand

Straight knuckle/collapsed finger joint:
Straight knuckle

Flat hand:
Flat hand


Video Examples

Many (but not all) of the Sunday Songs I have shared demonstrate proper hand positioning. Here are a few that I like. Please note that the techniques used are not necessarily the legato technique that I've been teaching on this blog.

I love watching Clay Christiansen perform:
Watch how Frederick Hohman pulls his hands back in front of the black keys when he isn't playing accidentals: You can see the curvature of Linda Margett's fingers: Homework Work to improve your posture at the organ, especially as it pertains to hand position. Have someone take a video of your hands and wrists as you play, then watch it to see what they look like. You might be surprised--I certainly was when I started this blog! Once you know what you're doing wrong, work to fix those things that are incorrect, then repeat the process as you continue to improve. In Conclusion As I've really focused on my hand position and keeping my arms and wrists still so that my fingers can move more easily, it's become much easier to play and perfect my technique. Proper posture and positioning at the organ really is essential to playing the organ properly.

Good luck!

Monday, August 23, 2010

Lesson 24: Creative Introductions for "Now Let Us Rejoice"

Click here for Lesson 23: Helpful Resources

A simple but effective way to increase hymn singing in your congregation is to utilize an introduction that will encourage good congregational singing. In a past article I discussed the importance of confidence and preparation, with two listening examples. I highly recommend taking the time to review that article before continuing on with this lesson, as preparation is essential before implementing the techniques taught today.

Begin Simply

The introduction can be a nerve-wracking experience for some organists. After the hymn is announced, everyone waits to begin singing while the organist begins to play an introduction. One way to counter-act these nerves is to begin simply. Here are three different ways to begin simply in playing an introduction for hymn #3 Now Let Us Rejoice.

1: Begin with the soprano line for a phrase; add the alto line for a phrase; add the tenor line for a phrase; add the bass line for a phrase.


2: Play the first phrase in unison, the second phrase in parts (either wholly on manuals or with pedal), the third phrase in unison, and the final phrase in parts with pedal.

3: Begin with a solo melody and move away stepwise to add in the remaining voices:
Now Let Us Rejoice Intro

In this example I kept all four parts in the manuals until the last phrase. The eighth notes can be changed to dotted eighth/sixteenth note rhythms instead, if desired. Click on the above example to view it larger. For demonstration purposes, I played the first part of this introduction under tempo, but in a worship service it should be played at tempo:

Moving Away From the Hymnal

 If you choose, it is also possible to use an introduction written by someone else. Many volumes of organ introductions and free accompaniments/harmonizations are available for purchase. When choosing this route, it is important to note which key the introduction is in! Playing the introduction in the key of Eb when the hymn is in the key of D would end in disaster. Remember--using this approach is more difficult that using the simple approaches outlined above. Good preparation is essential. Two examples of other introductions for this hymn are:

1: The Choirbook. A choir arrangement of Now Let Us Rejoice is available in The Choirbook. A suitable introduction can be pulled from this arrangement. However, please note the key signature: Either the introduction or the hymn will need to be transposed. At the Church music website, in the hymn player, this hymn can be transposed to any key necessary, then printed. Just make sure it is within the comfortable singing range of your congregation.

2: David L. Bytheway has a free (no-cost) free accompaniment available for this hymn. An introduction can also be pulled from his arrangement.    

Homework

Choose one of the five methods outlined above and prepare a creative (but not too creative) hymn introduction for hymn #3, Now Let Us Rejoice. Remember to keep in mind the text and melody. Simplicity is often more effective than complexity, but take care that the introduction is not too short (or overly long). Continue with music theory, practicing organ technique, and playing through pieces you've learned in the past, reviewing past lessons on this blog as necessary.    

In Conclusion

When done properly, using creative introductions can encourage members of the congregation to sing. Hearing something different can spark an interest in them to sit up and sing out. When done improperly, creative introductions call attention to themselves. If the organist is not well-prepared, members of the congregation will feel unsure about singing, afraid the organist will not support their voices. When the introduction is overly elaborate or ornamented, members of the congregation will focus on the organist and the introduction instead of preparing to sing the hymn. Using care when choosing an introduction, then listening to and following the Spirit is key. Help your congregation become excited about singing the hymns!

Continue on to Lesson 25: Leave the piano hands at the piano.

Monday, August 16, 2010

Lesson 23: Helpful Resources

Click here for Lesson 22: More technique (Don't forget the piano!)

As I contemplated the topic for today's lesson, I decided to share a number of available resources with you. As I mentioned before, a good, solid foundation is essential in order to progress further on the organ. Next week I'll share some creative hymn techniques, starting with hymn introductions, but first, here are some excellent resources. It is really important that you have this foundation before continuing, as I explain later in this lesson.

Music Theory

I mentioned in lesson 22 that it's a good idea to brush up on music theory, for as we continue through the lessons it would be nice to have that background. If you don't have access to a music theory book, you can look online for lessons. I haven't looked into these extensively, but here are two that I found with a quick Google search that appear to be well done:

Ricci Theory
Ricci Adams' MusicTheory.net

8notes Theory
Music Theory on 8notes.com

Organ History

Organ History

In lesson 21 I shared a brief history of the organ. An excellent site to learn more about organ history is:

http://www.concertartist.info/organhistory/begin.htm

There you can find a section dedicated to the organ and how it works, organ history, and a geographical tour through organ history. If you are interested in learning more than I was able to cover in lesson 21, this is an excellent resource for you.

Organ Tutor 101

Organ Tutor

Dr. Don Cook developed an interactive, multimedia approach to learning the organ. His Organ Tutor is used at BYU to teach students to play the organ. More information can be found here, including sample lessons:

http://www.ardpublications.com/

If you feel you need more help with organ technique than I'm able to give on this website, I recommend trying the sample lessons that are available, and if they help, it might be wise to purchase Organ Tutor.

Self-Study Organ Courses

BYU Organ Study

BYU Independent Study offers two free organ performance courses. You can find them here (scroll down to "music"):

http://ce.byu.edu/is/site/courses/free.cfm

These are another great resource and can be taken online.

Why is a foundation important?

I've mentioned the importance of a solid foundation before, but I never explained why.

In order to use some of the creative techniques for the organ, you will need to know the following:
  • What key the hymn is in, and what the tonic and dominant of that key is, in order to add a pedal point.
  • How to add passing, neighbor tones, and/or suspensions to a hymn.
  • How to play a hymn with the soprano, alto,and tenor in the manuals with the bass on pedal, and also how to play a hymn with proper legato technique entirely on the manuals.
  • How to solo out the tenor and/or soprano while playing the remaining notes in one hand with good legato technique.
  • How to play the alto line an octave higher (above the soprano line)
  • How to switch the soprano and tenor lines (so the soprano is played an octave lower and the tenor is played an octave higher)
  • How to play the soprano as a pedal solo while playing the alto, tenor, and bass on the manuals.
  • By looking at the date the composer lived, knowing whether to play the piece in the legato style, or whether to play the piece non-legato (which will be explained in the future)
  • How to transpose a hymn in your head, even to keys with six flats or five sharps.
  • And more...
We are about to get into a lot of really fun techniques. I don't want you to get overwhelmed, or to begin learning these techniques before you are ready, technically.

Homework

Begin working on hymn #3, Now Let Us Rejoice. Mark in the fingerings and pedaling. Read through the text and decide where to breathe and where not to breathe. Choose your registration. Learn the hymn as outlined in lesson 9. We will be using this hymn in our lesson next week.

Continue reviewing major scales and arpeggios and working through a piano technique book (on the piano).

Review the past lessons on this blog, keeping track of areas you need to work on.

Continue working through an organ technique book, such as Organ Tutor or the books discussed in lesson 22.

Continue playing through pieces you have previously learned, so that your progress is not lost.

Brush up on music theory using a music theory book you currently own or the websites listed above.

In Conclusion

Moving forward from this point is a lot of fun, but it also requires a commitment to proper organ technique and theory. I'm very excited to continue on this course with you!

Continue on to Lesson 24.

Monday, August 9, 2010

Lesson 22: More technique (Don't forget the piano!)

Click here for Lesson 21: The History of the Organ

I just took some time to review the 21 lessons which are currently on this website. I think they provide a solid basis for organ playing. In the next series of lessons, we'll begin branching out from this foundation.

It is now a good idea to begin working from a technique book. If you are interested in pursuing certification through BYU Independent Study, you might wish to use one of the books listed on their materials page:
  • Cook, OrganTutor Workbook ($17.50) or OrganTutor Organ 101 ($65-67.50).
  • Davis, The Organist’s Manual ($56) or
  • Gleason, Method of Organ Playing ($67) or
  • Keeler/Blackham, Basic Organ Techniques ($16)
It's also a good idea to brush up on music theory if you want to learn creative hymn techniques. The music theory book that is recommended for BYU certifications is:
  • Harder, Paul, and Greg A. Steinke. Basic Materials in Music Theory. ($59) (an old version works perfectly well)
Now that we've covered the basics in organ playing, we can start expanding from here. I reviewed all of the lessons on July 12th, and hope that you've taken the opportunity to go through the series of lessons again.

piano

In order to play the organ well, a good background on the piano really helps. If you don't already, I recommend starting to play and practice all of the major scales and arpeggios with the proper fingerings. Many online resources are available with this information. Here are three I found through a quick Google search:
Additionally, a Hanon, Czerny, or similar piano technique book is also recommended.

Homework

This week take some time to review your major scales and arpeggios. Pull out an old piano technique book and review the exercises found there. While not necessary, a good piano background does enhance organ playing.

Review the past lessons on this blog and do some self-evaluation. Keep track of areas you need to work on, and continue perfecting your organ technique.

Purchase an organ technique book and begin working through it.

Continue playing through pieces you have previously learned, so that your progress is not lost.

In Conclusion

While the organ is a completely different instrument than the piano, some of the techniques do remain the same. The fingerings of scales and arpeggios, and the skills learned through piano scales, arpeggios, broken chords, and chords technical studies will greatly benefit your organ playing.

Continue on to Lesson 23.

Monday, July 26, 2010

Lesson 21: The History of the Organ

Click here for lesson 20: Transcribing Piano Music for the Organ

Now that we've covered a lot of the basics, I thought it was probably time for a bit of a history lesson.

In listening to the Sunday Songs, you might have noticed that pipe organs have distinct sounds, depending on when they were built. While the organ dates back quite far, today I'll start with the Renaissance.

Renaissance

When the Renaissance began, organists usually were able to play on a single 8' Principal stop, or the Blockwerk, which included every stop on the organ.


Baroque

During the late Renaissance and Baroque periods, the organ's sound became more varied with stops such as the krummhorn and the viola da gamba. This is often considered the organ's golden age.

During this time period, different national styles of organ building began to develop. According to Wikipedia:

"In the Netherlands, the organ became a large instrument with several divisions, doubled ranks, and mounted cornets. The organs of northern Germany also had more divisions, and independent pedal divisions became increasingly common. "


"In France, as in Italy and Spain, organs were primarily designed to play alternatim verses rather than accompany congregational singing. The French Classical Organ, became remarkably consistent throughout France over the course of the Baroque era, more so than any other style of organ building in history, and standardized registrations developed."


"English organs evolved from small one- or two-manual instruments into three or more divisions disposed in the French manner with grander reeds and mixtures."

Classical

Organ music was seldom written in the Classical era--the organ pretty much skipped the classical period in favor of the piano.

Romantic

During the Romantic period, the organ became more symphonic. Due to new technologies, it was now possible to build larger organs with more stops, which meant more variation in sound and timbre, and more divisions. The desire for louder, grander organs required that the stops be voiced on a higher wind pressure than before, so Cavaillé-Coll configured the English "Barker lever" that we discussed here.

During this period, organ builders began to use more 8′ and 16′ stops and created a warmer, richer sound. Camille Saint-Saëns and Gustav Mahler used the organ in their orchestral works.


Modern Day

Pipe organ require a lot of space and a huge amount of money in order to be built. Instead, modern electronic organs are often preferred due to their smaller size and lower price tag. Electronic organ builders are constantly striving to make their organs sound as authentic as possible by sampling authentic pipe organs.

Homework

Continue practicing the organ as often as you are able so that you continue to retain what you have learned. Feel free to choose another hymn to mark and learn.

Take some time to read up on the history of the pipe organ online. Spend time listening to different online videos of pipe organs. Listen to and enjoy all of the different tonal colors that are out there.

In Conclusion

I am about as far from an expert as you can get when it comes to the history of the organ, but it does fascinate me. One of the reasons I love the organ so much is because of the numerous colors that are available at my fingertips, and because every organ is a new experience.

Continue on to lesson 22.

Monday, July 19, 2010

Lesson 20: Transcribing Piano Music for the Organ

Click here for Lesson 19: Registering the Organ for Choir Accompaniment

A month ago I shared the first guest lesson by Carol Dean, on how to register the organ for choir accompaniment. Today I'll share the second lesson, which shows how to transcribe piano music for the organ.

If you have ever tried to play a piano accompaniment on the organ, you've probably realized that changes need to be made. Here, Carol Dean shares some ways to do this.

Octaves

Octaves often become single notes, in both the treble and bass clefs. If needed, add higher-pitched stops for additional brilliance in manuals. In the pedals, using 16' and 8' stops automatically gives bass octave doubling.

In general, you will play the upper notes of bass octaves and the lower notes of treble octaves.

Bass Lines

Pedals do not always have to be used. If a bass line is simple and well defined, it may be played in its entirety.

Play a very rapid bass line on the manuals with the 16' pedal only on the accented beat.

Chords

Thin out the chord texture by putting chords in "open" position and getting rid of "doublings." Remember that when using 4' and 2' stops, doublings occur automatically.

Doubling piano

Doubling organ

Repetition

A compromise must be obtained between too much repetition and too much tying. Sustained block chords would rob a piece of its inherent motion, but repeating every note would result in too choppy an effect.

Repetition piano

Repetition organ

Arpeggios

Arpeggios are especially problematic when transcribed for the organ.

Arpeggio piano

Use a louder registration for right hand than left hand:

Arpeggio organ 2

Or this:

Arpeggio organ 2

For a lighter sound:

Arpeggio organ 3

Tremolo

Although rare, tremolos do occur occasionally. Sustain the outer voices, and let the inner voices do the repercussing.

Tremolo piano

Tremolo organ


Thank you again, Carol, for a wonderful lesson!

Homework

Using the choir piece you selected in lesson 19, modify it as outlined in this lesson for the organ, then begin practicing it, making additional modifications as necessary.

Continue working on previous homework assignments that haven't been mastered, and continue to practice the hymns and prelude pieces that you have learned in the past, so that you don't lose what you've gained.

In Conclusion

In the Church, many treat the organ and piano as the same instrument. In reality they differ greatly, as this blog constantly strives to teach. The tools taught in this lesson will help you play pieces that were written for the piano effectively on the organ.

Continue on to lesson 21.

Monday, July 12, 2010

Lesson Review

For some of you, like me, summer is a crazy time! I recommend taking this opportunity to review the lessons that have been covered to this point. As you practice the organ, reviewing past lessons will allow you to perfect skills you may have missed the first time around.

Before We Begin: Acquiring the Essentials discusses proper organ shoes, Carol Dean's marked hymnal, and how to compile your organ's stoplist.

Lesson 1: Understanding Parts of the Organ covers the organ console, the manuals, the pedal board, expression and crescendo pedals, stops, couplers, pistons and combination action, and the organ bench.

Lesson 2: Demystifying the Organ Stops, Part 1 explains the meaning of the numbers and Roman numerals on the organ stops.

Lesson 3: Demystifying the Organ Stops, Part 2 explains the flue pipes, the reed pipes, and their families and types.

Lesson 4: Hymn Registrations briefly explains the different types of registration and how to create chorus registrations for congregational accompaniment.

Lesson 5: Interpreting the Hymn Text teaches the importance of tempo, registration guidelines, and how to better share the message of the hymn through registration.

Lesson 6: Breaking in Those Shoes teaches proper bench positioning, the importance of clean pedals, pedaling basics and symbols, and intervals up to a fourth.

Lesson 7: More Pedaling quickly reviews lesson 6, then covers larger intervals, heel playing, prelocating, and releases and note value.

Lesson 8: The Manuals teaches proper posture, seven organ techniques, common tones and tying, and practical application.

Lesson 9: Playing Your First Hymn teaches the 15-step and 7-step methods for learning hymns using hymn 285, "God Moves in a Mysterious Way."

Lesson 10: More Techniques in Hymns covers the techniques needed to learn hymn number 4, "Truth Eternal," from pedaling and fingering, to common tones and repeated notes.

Lesson 11: Prelude Registration is from Don Cook's The New LDS Organist packet and covers chorus and solo and accompaniment registrations.

Lesson 12: Prelude and Postlude shares the importance of prelude and postlude, what to play, and when to start.

Lesson 13: Thumb Glissando and a New Hymn shares a video of proper thumb glissando technique and how to implement it in hymn number 11, "What Was Witnessed in the Heavens."

Lesson 14: Marking a Hymn, Part 1 teaches how to mark hymn 296, "Our Father, by Whose Name" for breathing.

Lesson 15: Marking a Hymn, Part 2 teaches how to mark hymn 296, "Our Father, by Whose Name" for pedaling.

Lesson 16: Marking a Hymn, Part 3 covers how to mark hymn 296, "Our Father, by Whose Name" for common tones and tying, direct fingering, and redistribution of the inner part.

Lesson 17: More on Stops, Couplers, Pistons, and Combination Action explains stops and couplers, pistons and combination action in more depth and explains how to utilize programmable pistons.

Lesson 18: Seeking More Instruction shares numerous websites, books, software, courses, and workshops that are available to organists of all skill levels.

Lesson 19: Registering the Organ for Choir Accompaniment is Carol Dean's first guest lesson and covers the basics for choir accompaniment registration.


Coming soon is the second part of Carol Dean's choir accompaniment lesson. Stay tuned!

As always, if you have any suggestions for future lessons, please leave a comment.

Thank you!

Tuesday, June 8, 2010

Lesson 19: Registering the Organ for Choir Accompaniment

Click here for lesson 18: Seeking More Instruction

I think it is safe to say that most ward choirs, and many stake choirs, in the church are accompanied by the piano. I have had the privilege to live in a stake where the choir for stake conference was always accompanied by the organ, and it really added something to the music and to the spirit of the meeting.

Earlier this year I had our stake choir's accompaniment be on the organ for the first time. The spirit of the meeting was greatly magnified, and I was told by the Stake President that the music has never been as powerful as it was in that meeting. The organ is a truly magnificent instrument.

I challenge you to work towards utilizing the organ in your ward and stake choirs as well.

A Guest Lesson

Today's lesson is Carol Dean's first guest lesson on accompanying the choir on the organ. Carol Deal is the individual who made Hymns from the L.D.S. Hymnal Marked for the Organ available to us! This hymnbook is priced at cost and I often state that it is worth its weight in gold. (Especially since Hymns: Simplified Accompaniments is over $26 from the Church Distribution Center and that volume still doesn't have any fingering or pedaling marked.) If you'd like to order it, email her at carolorg1111 @ gmail . com email me at ldsorganistblog @ gmail (dot) com.

Today she will cover registration. Here are Carol's tips for registering the organ for choir accompaniment.

Swell

Set up the Swell as a softer manual with flutes and strings (8's or 8's + 4's).

Use the Swell for softer portions of the accompaniment, adding possibly a 4' Principal and/or 2' Flute as needed until the volume of the Swell approaches the volume of the Great.

Pedal

Use the Great to Pedal reversible to balance pedal with Swell or Great. Turn it on when accompanying on the Great; turn it off when on the Swell.

Great

Transfer to the Great when the accompaniment needs more support, gradually adding Swell to Great and more 4's and 2' Super Octave as volume increases.

In General

Do not use celestes, as they distort the pitch, except possibly once in a while for a different effect in a particular area of a piece.

Avoid heavy reeds, mutations, and mixtures. While mixtures can occasionally add brilliance, they should be used judiciously.

Dynamic changes can be effected by the use of the Swell pedal, registration changes, or manual changes. Crescendo pedal may be used to achieve sudden "louds" or "softs" or to achieve a longer, gradual crescendo if hands are too busy to pull on more stops. However, if the crescendo pedal is used, much care must be taken when further engaging the pedal so that louder stops don't pop on while holding chords.

A solo/accompaniment registration may be used to feature an interesting melodic line in the accompaniment or as a descant or obbligato to the choir.

For accompaniments with very high and very long ranges (remember, the piano has 88 keys, the organ only 61), bring the notes into the middle area of the organ. When 4's and 2's are on, any really high passages will be much higher and much more shrill than on the piano.

Remember that the only way to achieve accent on the organ is with silence, delay, or a combination of both. When you are preparing an accompaniment that is very orchestrally conceived (many ties and few rests), remember that you must provide articulation before strong beats in some of the voices to keep the forward motion and sense of rhythm clear to your choir and to the congregation.

Your job as an accompanist is to support the choir, not drown them out.

Arrange for as many rehearsals accompanying your choir on the organ as possible. The size of the choir determines the size of your registration. It takes time and trial and error to come up with the best possible solution to accompany effectively on the organ. It will not happen with just one choir/organ rehearsal.


Thank you so much, Carol! I hope my readers take your lesson to heart, and I look forward to posting your next installment.

Homework

Review this lesson and try some different registrations on the organ, that are geared towards choir use. Choose a choir piece that you would be interested in accompanying (there are many resources online: defordmusic.com, petriefamily.org/ldsmusic, or jackmanmusicexpress.com for a small fee are just a few). Think about how you would like to register the piece, and be prepared to adapt it for the organ in a future lesson.

Continue practicing your 3-stave hymn.

Continue working on previous homework assignments that haven't been mastered, and continue to practice the hymns and prelude pieces that you have learned in the past.

If you are interested, seek out a private, certified organ instructor or utilize the resources available through BYU (outlined in lesson 18).

In Conclusion

The organ is beautifully suited to accompany the choir. Through judicious use of stops, the organ can enhance the message of the choir and fill the room with a greater spirit of the music. While the piano's sound never varies from the hammer on the string, the organ can change from flutes, to light reeds, to full principals, as the text and accompaniment dictates, allowing a much richer experience for the congregation.

Continue on to Lesson 20.

Monday, May 24, 2010

Lesson 18: Seeking More Instruction

Click here for Lesson 17: More on Stops, Couplers, Pistons, and Combination Action

Today's lesson is a little different from normal. I'm striving to teach every aspect of organ playing possible through my lessons, articles, and Sunday songs. BYU also has a number of training resources, which I'd like to share with you today.

Make sure you read to the end. The BYU Organ Workshop will be explained at the very bottom of the post, followed by a homework assignment.

Main BYU Website

The Organ Study at BYU Website is www.organ.byu.edu. Once there, you can click on "LDS Organists and Teachers" to find organ instructors in many areas.

Books and Software from BYU

Hymn Studies for Organists (Belnap). Visit http://creativeworks.byu.edu/catalog and then enter “hymn studies” in the search box and click “enter”. ($15.95 + shipping)

Three-Stave Hymn Accompaniments (Cundick). Visit http://creativeworks.byu.edu/catalog and then enter “three-stave” in the search box and click “enter”. ($10 + shipping) Also available for free download on the Internet http://www.organ.byu.edu/3StaveHymns/index.htm

OrganTutor (Cook) (visit www.organtutor.byu.edu and then follow the specific links)
  • OrganTutor Organ 101 Complete
  • Computer tutorial on CD-ROM (for PC and Mac) and Workbook ($69.50 + shipping)
  • Computer tutorial and printable Workbook (pdf files) on Internet ($20-$30 per year)
  • Computer tutorial only (no Workbook)
  • On CD-ROM (for PC) ($50 + shipping)
  • On Internet ($25 per year; $15 per 6 months)
  • Workbook only (no computer tutorial)
  • Printed ($19.50 + shipping)
  • Printable on Internet ($6)
  • Organ 101 Introduction (free selected lessons)
  • On CD-ROM (for PC) or on Internet
Organ Courses Through BYU Independent Study and the Internet

Visit www.organ.byu.edu and then click BYU Independent Study Students and follow the specific links.
  • Music 399R Sections (Levels) 1-6 (courses offering college credit)
  • Organ 71 Beginning organ for Pianists with little or no previous formal organ training, or who need help in applying what they have learned in their organ playing.
  • Certification track (a $30 non-credit version of Music 399R Level 1 that offers a certificate)
  • Self-study track (a free non-credit version of Music 399R Level 1 that does not offer a certificate)
  • Organ 72 Review of basics for those with organ training, but who would benefit from a review of basic legato organ technique, repertoire, hymn playing, and registration. Should be able to sight-read single-line melodies.
  • Certification track (a $28 non-credit version of Music 399R Level 2 that offers a certificate)
  • Self-study track (a free non-credit version of Music 399R Level 2 that does not offer a certificate)
The New LDS Organist (A free “quickstart” organ course in 12 podcasts) Visit www.organ.byu.edu/newldsorganist

Creative Hymn Playing Techniques (Music 116R podcasts/audio lessons) visit www.organ.byu.edu/116podcasts.htm

Organ Workshops

The BYU Young Musicians Summerfestival (for ages 14-18, June 13-19, 2010) http://summerfestival.byu.edu

The BYU Organ Workshop (for adults, August 3-6, 2010) http://organworkshop.byu.edu

The BYU Organ Workshop

The BYU Organ Workshop is an intensive four-day program designed for organ skill-building for all organ levels and is usually held the first week of August from Tuesday through Friday with a preworkshop seminar on Monday. Enhance your organ-playing skills for your own enjoyment, for church service, or for teaching. Discover and improve your talents and proficiency as you learn valuable techniques and tips from skilled instructors. Whether you are a beginner or an experienced organist, the workshop has much in store for you. Over 80 classes are offered with customized instruction and supervised practice for your specific level. Organ tours, concerts, exhibits, and a hymn sing are also included.

The price is a bit steep, but it's worth every penny. Currently the fees are:

WORKSHOP FEES

$250 (April 3–July 17)
$275 (after July 17)

OPTIONAL ADD-ONS:

Campus Housing, $100 (double occupancy)
Private Organ Instruction, $25 (one 25–minute session)
Private Organ Instruction, $40 (one 50–minute session)
Instruction Placement Audition, $10 (available only on Monday)

If this interests you, I recommend saving up for it. If you can't make it this year, save for next summer. The BYU Organ Workshop is an extension of the organ portion of the Workshop on Church Music, which ran at BYU between 1979 and 1999. The BYU Organ Workshop started as its own program in 2002, and is in its ninth year of operation.

Homework

Visit www.organ.byu.edu/3StaveHymns/index.htm and download a one of the simpler 3 Stave Hymns. Mark it as explained in lessons 14, 15, and 16. Choose an appropriate registration for each verse as taught in lessons 4 and 5.

Practice slowly,with a metronome, following the steps for learning a hymn outlined in lesson 9.

Continue working on previous homework assignments that haven't been mastered, and continue to practice the hymns and prelude pieces that you have learned in the past.

If you are interested, seek out a private, certified organ instructor or utilize the resources available through BYU (outlined above).

In Conclusion

There are a number of resources out there that will help you learn how to properly play the organ. While an organ teacher with AGO certifications is ideal, the OrganTutor software is amazing, and the BYU Independent Study program can also help you achieve your goals. The BYU Workshop never disappoints (quite the contrary, actually--everyone raves about it), and Don Cook's podcast is excellent as well.

My blog exists as one of many resources. Thank you so much for reading!

Continue on to Lesson 19.

Monday, May 17, 2010

Lesson 17: More on Stops, Couplers, Pistons, and Combination Action

Click here for Lesson 16: Marking a Hymn, part 3

In Lesson 1: Understanding the Parts of the Organ, I presented an overview of the console. Today, with more information provided by Carol Dean, we'll delve into a little more depth on stops, couplers, pistons, and combination action.

Stops and Couplers

stops
Photo Source

On most larger pipe organs, the pipes which are accessed by each individual keyboard are grouped in specific areas of the case. In smaller organs, with two manuals, the great is open and the swell is grouped together in the swell box. The Salt Lake Tabernacle keyboards from bottom to top are: Choir/Positive, Great, Swell, Solo/Bombarde, and Antiphonal, and each has its own area in the case for the related pipes.

In the newer electronic organs, pipe organ sound is actually sampled and saved into a computer chip which is accessed electronically from the different keyboards or divisions.

As mentioned in Lesson 1, couplers belong to the non-speaking stop category--they affect the speaking stops but have no sound of their own. The couplers you will most likely see on your two-manual church organs are: Swell to Great, Great to Pedal, Swell to Pedal, and possibly one or more Sub or Super couplers such as Swell to Swell 16' or Swell to Swell 4'.

Octave (sub or super) couplers work within a manual to double the stops up or down one octave. For example, if you have one 8' Swell stop selected, engaging Swell to Swell 4' (super coupler) and then playing middle C will result in your hearing middle C and the C above middle C. If you instead select Swell to Swell 16' (sub coupler), you will hear middle C and the C below middle C. Most organs with sub and super couplers will also have a Unison Off stop tab or reversible thumb piston (explained below). If the Unison Off is engaged along with an 8' stop (for example) on the Swell and the Swell to Swell 4', you will not hear the stop at the pitch indicated on the tab (8'). You will only heard the effect of the super coupler–the pitch one octave higher than the note you are actually playing.

In a pipe organ, a rank is a row of pipes in one tone color, with one pipe dedicated to each key. Each stop turns a rank of pipes "on" or "off." In electronic organs, each speaking stop accesses sample pipe organ sounds that have been digitally stored in computer chips–technology called PDI or parallel digital interface.

Pistons and Combination Action

toe studs
Photo Source

Thumb pistons and toe studs are part of the combination action system. Depending on your organ, some pistons are available both as thumb pistons and toe studs.

A Tutti or Sforzando piston functions like a crescendo pedal that is all the way forward, selecting every stop available on the organ except those that do not work well in a large ensemble sound, such as solo reeds, celestes and the tierce.


thumb pistons
Photo Source

Although they appear identical to thumb pistons and toe studs, reversibles serve an entirely mechanical function independent from the combination action. The oft-used Great to Pedal reversible can serve as an illustration. When it is pressed the first time, the Great to Pedal coupler is drawn, or engaged (in most cases the drawknob or stop tab actually moves into "on" position). When depressed the second time, the action is "reversed," retiring the coupler back into "off" position. Depressing a Great to Pedal reversible repeatedly simply brings the drawknob or stop tab in and out or up and down. The most common reversible pistons on the smaller electronic organs are: Tutti (or Sforzando), Great to Pedal, Bass coupler, and Melody coupler.

Programmable Pistons

thumb pistons
Photo Source

Organs have general pistons and most organs also have divisional pistons. These pistons are usually programmable, although some organs have one or more memory levels which are locked.

General thumb pistons are numbered and are usually located to the left of other thumb pistons, under both the swell and great manuals. Divisional pistons are also numbered, affect only one division of the organ, and are generally located just under the manual of that division.

Above the pedalboard on the right there are a group of divisional toe studs that only memorize stops for the pedal division. The group on the left are the general pistons which affect all stops and couplers on the organ. These are repeats of the thumb generals below the manuals. The last kind of toe studs you will see are called reversibles. These are usually spread out across the bottom of the console, above the generals and pedal divisionals.

In newer organs, combinations are stored in a computer memory. To set a combination, pull the desired stops, choose your memory level, hold the setter button (usually labeled "Set"), and press the desired piston. Larger organs and newer organs generally feature a system of memory levels: each organist is assigned a level or a range of levels and is able to keep his registrations separate from those of other organists who play the instrument. It is a good idea to keep a sign-up list on your organ so that each organist's settings aren't inadvertently cleared by another ward, stake, or guest organist.

Homework

If more than one organist uses your organ, create a sign-up list so that each organist can sign up for at least one memory of their own.

Looking back over the hymns you have learned, and the prelude that you have played, program your memory level in your organ for the registration changes you have chosen. Practice playing through these hymns, using the thumb pistons or toe studs.

Plan 10 to 15 minutes of prelude music, using the programmable pistons to create a variety of colors. Make a note of which piston to use when on your music. Practice until you can smoothly change between pieces. Play prelude for Sacrament meeting or another church meeting, using these thumb pistons.

In Conclusion

I hope this lesson was helpful to you. Utilizing the programmable feature on your organ allows for a smoother prelude, without sacrificing a variety of tone colors or allowing for large moments of silence while new stops are selected.

Continue on to Lesson 18: Seeking More Instruction.